Crown Moldings – Methods To Measure, Cut And Install
To All Our Valued Customers, Over the past few years, the Covid 19 Pandemic has forced us to adapt and change the way we do things on a day-to-day basis. Florida Lumber is no exception. To make sure that we remain strong and competitive in the market for the years to come, Florida Lumber has had to adjust and change our vision for the future. In the last 2 years, we have stopped selling Sheetrock and drywall products, roofing felt and roofing materials, and have even closed on Saturdays.
Over the last few months, we have been transitioning our way out of the door supply business so on August 31, 2022, our door shop will stop assembling doors. We will continue liquidating our doors from inventory until we are out of material.
Some customers have asked if we are closing or even moving locations. To set the story straight, we are not closing or selling the business and we are not moving. These changes are all part of our new vision and path to continue serving South Florida and increasing our footprint in the construction supply industry.
Our focus is going to be on Lumber, Construction Materials, Rebar Fabrication and Rebar Accessories. As we have liquidated some of the items that we don’t sell anymore we have created more space to buy a larger volume of our core items and pass on the savings to our customers.
In the next year you will start seeing changes that will help improve our ability to serve you, our customers. We appreciate your business and your patience as Florida Lumber’s new vision becomes reality.
A Todos Nuestros Valiosos Clientes En los ultimos anos, la pandemia de el Virus (Covid 19) nos ha forzado a adaptarnos y cambiar la forma de hacer cosas en el dia a dia. Florida Lumber no ha sido una excepcion.
Para asegurarnos de mantenernos fuertes y competitivos en el mercado en los anos venideros, Florida Lumber ha tenido que ajustar y cambiar nuestra vision para el futuro. En los dos ultimos anos hemos dejado de vender los productos de yeso (sheetrock), paneles de yeso (drywall), tela asfaltica (roofing felt), materiales de techo y cerramos los Sabados. En los ultimos meses, hemos estado en transicion para salir del negocio de suministro de puertas, en Agosto 31, del 2022 nuestra tienda de puertas dejara de construir y/o cortar puertas. Vamos a continuar liquidando nuestro inventario de puertas haste que terminemos todo el material. Algunos de nuestros clientes han preguntado si estamos cerrando o si nos estamos moviendo a otra localidad. La verdad es que no estamos cerrando, no estamos vendiendo y no estamos cambiando de localidad. Estos cambios son todos parte de nuestra nueva vision y camino a continuar sirviendo al estado sur de la Florida y incrementar nuestras huellas en la industria de suministros de construccion.
paneles de yeso (drywall), tela asfaltica (roofing felt), materiales de techo y cerramos los Sabados.
En los ultimos meses, hemos estado en transicion para salir del negocio de suministro de puertas, en Agosto 31, del 2022 nuestra tienda de puertas dejara de construir y/o cortar puertas.
Vamos a continuar liquidando nuestro inventario de puertas haste que terminemos todo el material. Algunos de nuestros clientes han preguntado si estamos cerrando o si nos estamos moviendo a otra localidad.
La verdad es que no estamos cerrando, no estamos vendiendo y no estamos cambiando de localidad. Estos cambios son todos parte de nuestra nueva vision y camino a continuar sirviendo al estado sur de la Florida y incrementar nuestras huellas en la industria de suministros de construcción.
2431 N.W. 20TH ST.
MIAMI, FL 33142
PHONE: (305) 635-6412
Sales Fax: (305) 633-4054
Accounting Fax: (305) 635-3723
Email: sales@tloridalumber.com
A crown molding is placed in a room to improve its appearance with an overall polished look. Even though the installation of crown molding is very simple, yet, obtaining the perfect angle cuts required for the corner portions calls for attention.
The process can even intimidate and put you in confusion at the beginning. This guide pinpoints the best practices generally followed to measure, cut, and install crown molding.
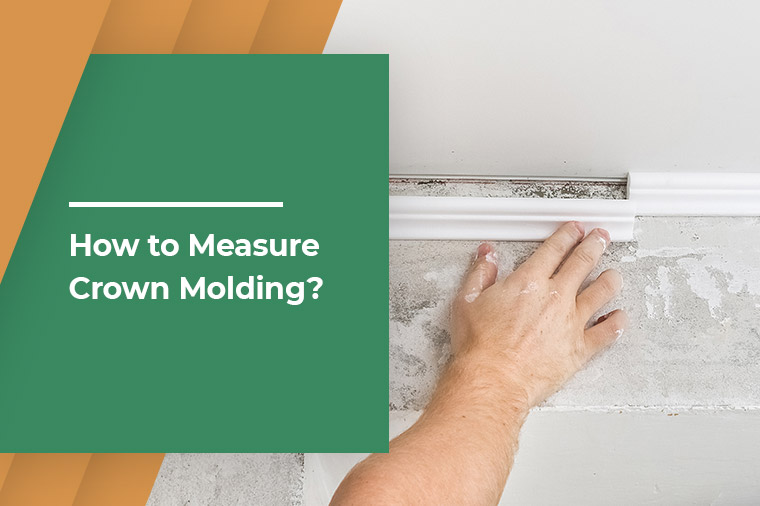
How to measure crown molding?
When a room is fitted with crown molding, a substantial boost in the character and depth of the room is brought about. Besides, crown molding helps amplify your unique style and prerequisites.
Since crown molding is a decorative elaboration, it becomes quite problematic and useless to work with commonly used materials in the course of the installation process. The technique calls for precise measurements and neat cutting for creating a smooth, unbroken connection among various segments.
In case, you’re contemplating working on one such project, here are a few tips to help you manage to measure and cut moldings.
Tools you need to measure crown molding
While working with traditional building materials, solid woods, and plaster, the following key items of equipment will guide you on how to measure crown molding.
-
Clamps
-
Combination square
-
Miter saw
-
Pencil
-
Safety glasses
-
Scrap wood
-
Tape measure
Steps to measuring and cutting crown molding
In general, crown molding comprises two-angled edges. Also, because of the requirement of its distinctive alignment, it needs to be leaned against both the walls and the ceiling. Of course, you can employ the miter saw for cutting it to the proper size. However, the process can be very exhausting, in particular, at times when the alignment between adjacent walls isn’t perfectly 90 degrees.
To make things happen more effortlessly follow the steps below.
-
Make use of 2 pieces of scrap wood
See to it the 2 pieces of scrap wood have the same width. The first piece is to be placed on the wall in proximity to the ceiling. Next, the second piece is to be laid above the first keeping an inch of overlap in between.
It’s essential to position the second scrap wood near an outside corner facing the room’s interior. On the other hand, in the case of an inside corner looking away from the interior of the room, the second scrap board is to be laid atop the first. Finally, both the boards need to be pushed into the corner.
-
Draw marks and take measurements of molding
Once you’re done setting up the measurement, mark the region of overlap of the two scraps by drawing a line with a pencil. The line must be drawn along the edge of the board that’s nearest to you. Next, the two opposite corners are formed by shifting the edge of the board closest to the ceiling and the drawn line.
This will be followed by a step where you draw a diagonal from one corner to the other with the help of the combination square. This diagonal is a representation of the actual angular bisection between the two walls.
Once again, use the miter saw for cutting along the line of bisection. Next, you need to figure out what length of crown molding is needed. This can be achieved by running the tape measure from one corner to the other.
Keep in mind, while the inside corner indicates the long point of the cut made by the miter saw the outside corners indicate just the opposite. Make sure you get these points marked with a pencil.
-
Make the molding ready for cutting
This can be done by placing the crown molding on the miter saw in an upended position. Ensure the bed acts like the ceiling and the fence of the saw acts like the wall. Next, with the help of clamps, fix the segment in position, make the cut, and have the process repeated with other segments.
Do this in continuity until you get exactly what you need. For specific types of crown molding, several different saws such as handsaw, jigsaw, etc. also work perfectly.
How to cut crown molding?
There are four ways by which you can effectively cut a crown molding. These include the following:
-
Square cut crown molding - This is the simplest way to cut crown moldings. Every so often, the technique is used for creating a butt joint, a place, wherein the cut end of the molding is found to be fitting flush against a corner wall.
-
Crown molding scarf joint - You can significantly benefit from the scarf joint method of cutting when the length of the wall in a room is more than a single piece of the embellishment. Mainly, the use of scarf joints is employed for connecting two pieces of crown moldings that are cut 45 degrees at variance and overlap one another to produce a slice.
-
Outside corners - Also known as outside miters, they’re cuts put into use when a room has more than four corners. Occasionally, the presence of an entryway, a chimney, or bay windows can prevent crown moldings to simply outline the square or rectangular shape of the ceiling. In such scenarios, the molding reaches a point where it looks similar to the bow of a ship.
-
Inside the corner using a coped joint - In fact, wall corners are seldom perfectly 90 degrees in opposition. Thus, gaps in the joints may look ugly and fail to give off a finished look. In these instances, crown moldings can be easily cut to obtain a tight seam with an inexpensive coping saw. This method holds good for an inside corner where the saw helps scoop out unwanted material lying in the back of the leading edge of the molding. The outcome? Only the ornate profile complements its match in the corner.
Crown molding installation
To install crown molding, first, you need to apply beads of the best quality construction adhesive. The application should be done along the whole top as well as bottom surfaces that come in contact with the ceiling and walls. Make certain the adhesive is likewise applied on all joints. Press the molding in place by starting from one corner.
Subsequently, position the other corner by swinging it through. In this way, the molding looks slightly bowed in the middle. Once both the corners are secured, but the remaining part of the molding in place by pressing and fastening it with corrosion-free, 16 inches nails along the molding’s top and bottom edges.
This method of installation is cleaner because of the application of the adhesive only on the crown molding. Besides, by adopting this method, you can prevent the adhesive to tarnish other areas of the ceiling and walls.
To remove traces of adhesive, if at all any, from unwanted places, immediately, clean them using a wet rag. Also, if you come across any adhesive leakage from any part in the course of the drying process, gently scrape the dried material off by using a utility knife.
Conclusion
In case you want to ease the pressure off by smoothly putting all these steps together without letting go of the beauty of crown moldings, Florida Lumbar comes with options to effortlessly measure, cut, and install stunningly crafted, durable, and easy-to-handle crown moldings.